
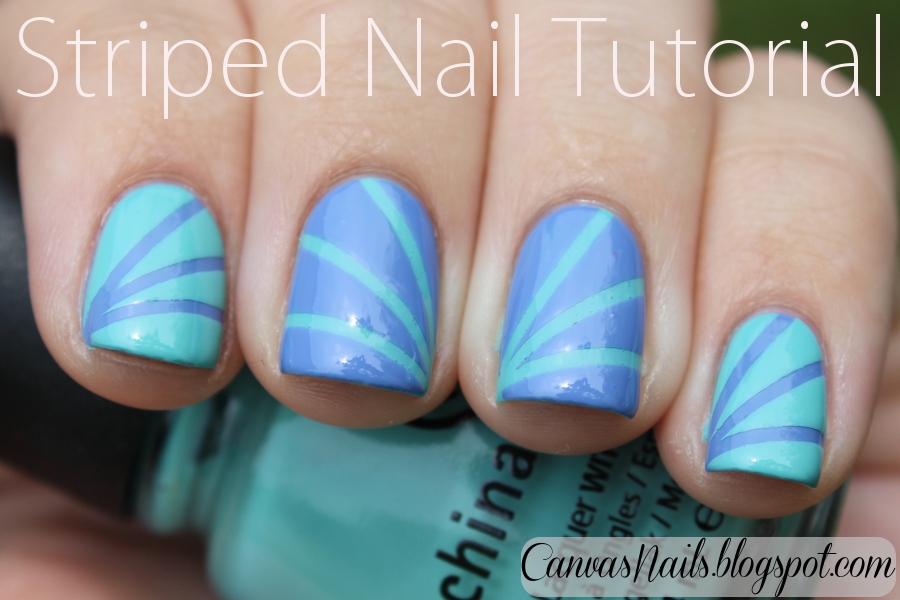
Here's a quick tutorial for you to show you how I created my taped manicure from the other day. It's very simple but creates a really fun look.
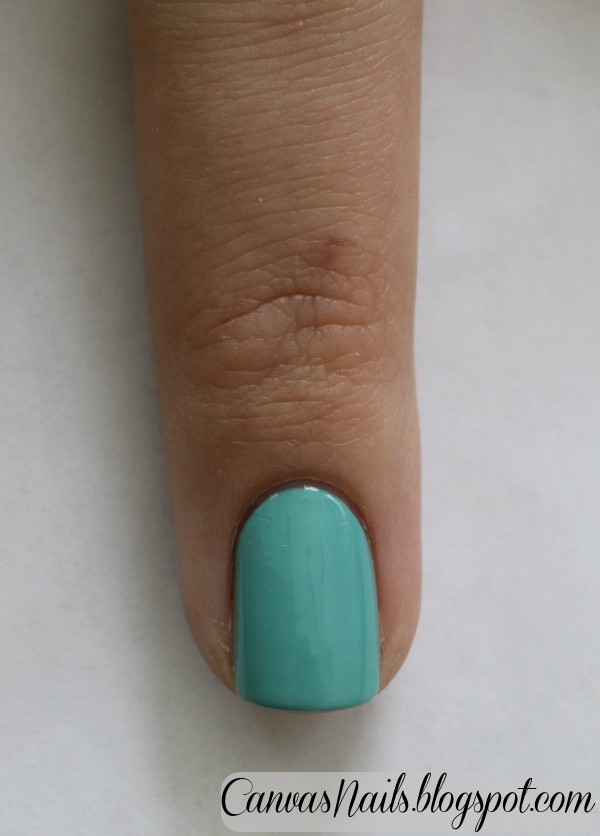
1. Start by painting your nails with the color that you want your stripes to be. Make sure your polish is completely dry before you start. I was working with a day old mani but you could apply a quick dry top coat to freshly painted nails and wait about 30 min-1 hour or until your nails are fully dry. (This is China Glaze For Audrey)

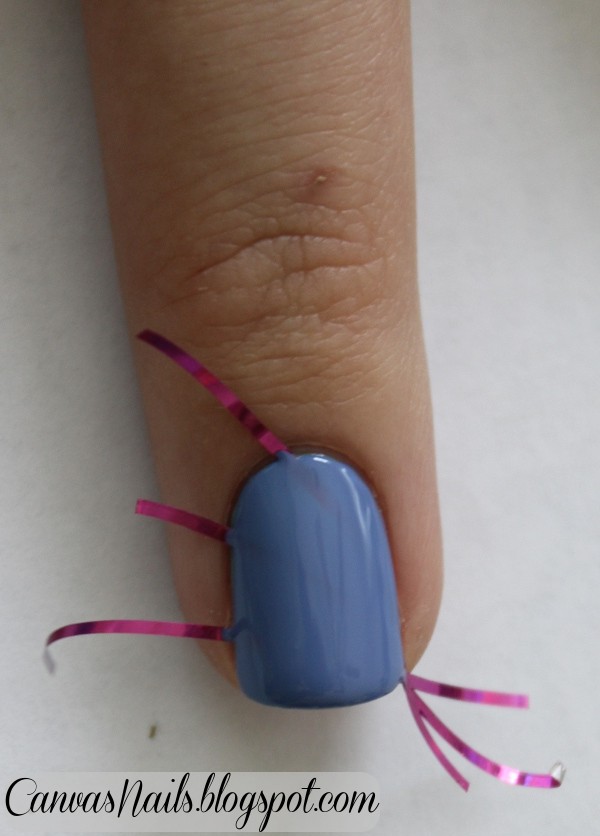
2. Apply the tape where you want your stripes to be. I used striping tape (I bought mine off of Amazon) but you can use regular scotch tape or painters tape. Remember the order in which you placed the tape down. This will prevent you from messing up your nails if any of your pieces of tape overlap.
3. Paint over the tape. It's best to use a polish that can be opaque in one coat. (This is China Glaze Electric Beat)

4. Pull the tape up gently while the polish is still wet. Don't wait too long or the polish will become tacky as it starts to dry and it might cause your lines to get messed up.
3.JPG)
5. If you need to, clean up around your nails with nail polish remover. Apply your favorite topcoat. You may need more than one coat since your polish will be slightly bumpy where the stripes are. Enjoy!
That's gorgeous! *adds striping tape to wishlist*
ReplyDeleteThank you! Striping tape is so nice. I hate having to cut tape into small strips!
Deletethat's so neat! I need striping tape now xD
ReplyDeleteMust. have. striping. tape. I love your blog, your manis are gorgeous! I followed, could you follow mine too? www.youneedamanicure.blogspot.com
ReplyDeleteHow long do you leave the tape on for before peeling it off? I tried this tonight and it didn't go well.
ReplyDelete