Pages

Search This Blog

Showing posts with label Illamasqua. Show all posts

Tuesday, October 23, 2012

Illamasqua Load

The whole point of this post is just that I wanted to say how dumb I am. I didn't realize until like a month ago that Illamasqua polishes have a removable cap (ie Butter London and Chanel). I would get so angry at the caps for not lining up straight after I used them and then I read on someone's blog (I can't remember who's it was now) that the caps are removable! Well now I feel stupid! I ran to my helmer to check my caps and wouldn't you know it, they popped right off. Now all my caps are nice and straight again. 

Here's Illamasqua Load. It was one of my first Illas (I bought Jo'mina at the same time) and I was in love instantly. It's a very flattering shade since it's not as stark as a traditional white polish. The name is a bit racy but as long as your grandmother isn't asking you to explain it, then you're all good. 
Shown is two coats. Application was easy for me. I did slightly thicker coats (not too thick) so that I wouldn't have any streaking and it went on beautifully. 


Sunday, August 19, 2012

Shimmer Polish Spam!

About a week ago I purchased three polishes from Shimmer Polish: Stephanie, Caroline, and Gerry.

I liked that these mainly consisted of smaller glitters. A lot of indies seem to mostly be creating polishes with larger and multi-shaped glitters and while I love those, it's always nice to see someone doing something a bit different.
The packaging is really cute! They all have a heart on the label that corresponds to the color of the polish.
All three of the ones I own (and I believe her other polishes are this way as well) are glitters in a clear base so you could layer them over any polish.

These are very dense, I think they could be opaque in 2-3 coats but I decided to layer them over a base color because I prefer that look. They're all shown with 1 coat over a base color.


Shimmer Polish Stephanie over Zoya Robyn.
I really liked this one! The primary glitter color is blue.


Zoya Robyn
Application was wonderful. Zoya knows how to make a great creme polish, that's for sure. 2 coats.


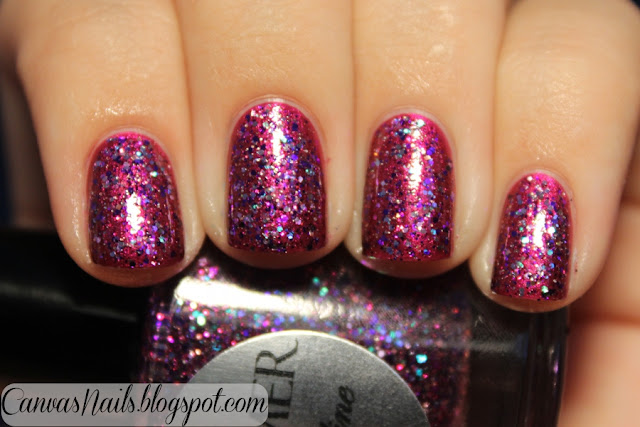
Shimmer Polish Caroline over Model's Own Magenta Pearl.
My camera had a hard time taking pictures of this one. I think it was the base color that was causing problems with my camera. 
The primary glitter color is a dark magenta.


Model's Own Magenta Pearl.
Absolutely gorgeous! This polish really glows once it's on your nails. 2 coats.


Shimmer Polish Gerry over Illamasqua Jo'Mina.
This one was my favorite out of the three that I ordered! The primary glitter color is purple but there also seems to be a fair amount of blue glitters in there as well. 


Illamasqua Jo'Mina.
Every time I wear this polish I'm always amazed at how amazing the formula is. It practically applies itself and the color is one of my favorite shades of purple. 2 coats.


The creator of Shimmer Polish is also starting to create custom polishes! I'm already planning my next order!


Tuesday, July 3, 2012

4th of July Nails!

I've been thinking about this mani for a few weeks now. I saw a video a few weeks back that showed how to  make tiny strings on your nails. The first time I tried it out, I didn't do so well. The strings were too large and it just didn't look good. I was determined to make it work though, so I tried it again. 

I'm very happy with my results this time!

The colors are:
Blue- China Glaze First Mate
Red- Illamasqua Ruthless
White- Wet N Wild White Creme


The video I used for inspiration is posted below. I was much more patient this time in waiting for my polish to get tacky and that helped me to get the look I was going for. The longer you wait, the thinner the strings will be when you lift your dotting tool out of the polish (you could try using a bobby pin or a toothpick if you don't have a dotting tool). 

I put a few drops of blue and red on a plastic bag and waited a few minutes for them to thicken up. If you don't want to wait, let the drops of color start to thicken up while you paint your nails. By the time you finish painting the drops should be thick enough for you to be able to start making strings!